Hi, I’m Tom from Toothpaste, and welcome to our guide to tooth whitening.
What You Need to Know About Tooth Whitening
So, you’ve decided to do some tooth whitening. What do you need to know? The first thing to know is that throughout tooth whitening, although it doesn’t do any damage to your teeth, you can get some increased short-term sensitivity and discomfort. Which will settle quickly, in the days following the bleaching. The amount of discomfort will vary from person to person and it’s very hard to predict how much someone will experience throughout it.
Recommended Approach to Whitening
So that’s why it’s important not to try and rush through it. As a result of this, we recommend that you do it gradually, trying to get the result that you want over the course of a couple of weeks.
Starting with Top or Bottom Teeth
We recommend that people generally just do either their top or their bottom teeth to start off with, just doing them one at a time. This first of all means that if you do get a little bit of discomfort, it’s only half of your teeth. And second, it’ll actually give you a bit of a yardstick against which you can compare the improved shape or colour of your teeth as you go.
The Whitening Process
Making the Custom Trays
The process starts off with taking a couple of impressions or molds of your teeth from which we pour some plaster casts and make some custom-made trays which you will use to do your tooth whitening.
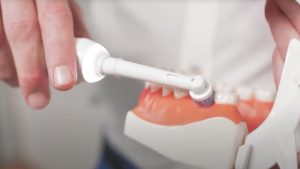
How to Use the Bleaching Trays
Once you have your custom trays, you’re ready to start. You’ll have a small syringe of bleach, and what you want to do is load a small blob of bleach, about the size of a match head into each of the front 10 teeth.
Regarding Molars
We generally recommend that you don’t bother with the molars as they’re not usually visible and you’re just increasing your chance of getting some sensitivity there.
Initial Application
Gently place the tray into your mouth and seat it into position. If you feel the gel squeezing out over the top, you’ve probably put too much in. Once you’ve placed your bleaching tray, we suggest that for the first time you just give it a go for 10 minutes.
Gradually Increasing Whitening Time
Remove the bleaching tray, wash it all off, and make sure that it’s not feeling too uncomfortable. If this is feeling okay, you can then move on the next evening to do it for 1/2 an hour and the following day, every night for two weeks.
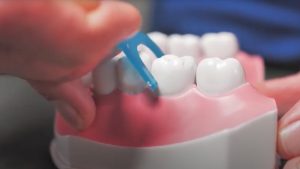
Flexibility and Managing Sensitivity
The benefit of this system is its flexibility. So, if you do find yourself getting a bit of sensitivity or discomfort, you can back off, let it settle a little bit, you can even load your trays with some sensitive toothpaste and wear them for an hour or even all night while you’re asleep to help reduce that sensitivity.
Long-Term Use of Bleaching Trays
If you hang onto your bleaching trays as well, if you feel like you need a top-up of your whitening, 18 months or two years later, you can just come into the practice, get another syringe of bleach, and then you can have a go again without going through the same cost and hassle of molds every single time.
Further Assistance
Should you have any other concerns or questions with the process, give us a call at the practice and we’ll be happy to answer any questions you may have.